


Turning the Brief into a Visual Story
A storyboard for motion is a planning tool that translates a written brief into a sequence of visible events. Its purpose is not to decorate a video with attractive images; it is to make the story understandable before production begins. Each storyboard shot should answer three questions: what the audience sees, what changes, and why the change deserves attention.
For this lesson, consider a 30-second campaign for a fictional smart bottle called Solace. The brief says: a commuter rushes to catch a train with a crumpled plastic bottle; the bottle is transformed into a sleek reusable model; the commuter uses it throughout a busy day; the product ends in a clean, memorable final frame. The story is not complete until the audience can recognize the problem, transformation, experience, and resolution without relying on technical explanations.
A useful shot contains six elements: frame size, subject placement, action, camera movement, duration, and visual emphasis. For example, a medium shot may show the commuter on a crowded platform, move slightly forward as the train arrives, and hold for three seconds. That description is more useful than simply stating “show a commuter.” It defines what viewers can see and gives later prompt writing, image generation, editing, or filming a stable foundation.
Building the Story Beat Map
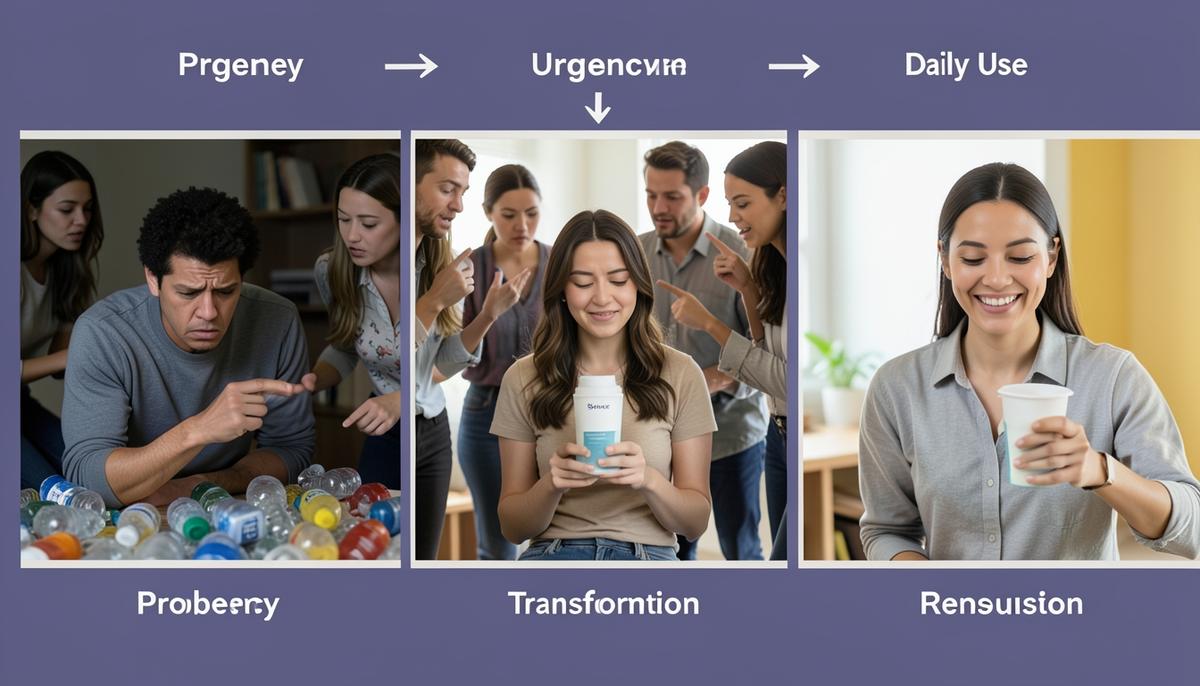
Begin by dividing the brief into story beats. A story beat is a meaningful change in information, emotion, or action. The Solace campaign could contain five beats: expose the disposable-bottle problem, create urgency, reveal the transformation, demonstrate the product in daily life, and resolve with a clear product impression. Not every beat needs a separate shot. The goal is to connect cause and effect, not to create a predetermined number of frames.
Assign each beat a purpose and an emotional movement. The problem beat moves from calm to stress. The transformation beat moves from confusion to relief. The demonstration beat moves from relief to confidence, while the final beat turns confidence into preference. This progression helps designers decide whether the visual style should become brighter, calmer, more spacious, or more energetic as the story advances.
A simple beat map can show the narrative direction and the screen time allocated to each stage. The map does not need detailed artwork, but it should reveal whether the opening is confusing, whether the product appears too early or too late, and whether the ending receives enough time to register.
Designing Framing, Action, and Emphasis
Framing controls what the audience can notice first. A close-up of a crushed plastic bottle beside a cracked shoe creates immediate tension. A wide shot of the station may establish context, but it can weaken the problem if the bottle occupies only a small part of the frame. Alternate scales when the story needs information: use the wide shot to show the arriving train, the medium shot to show the commuter’s decision, and the close-up to show the bottle.
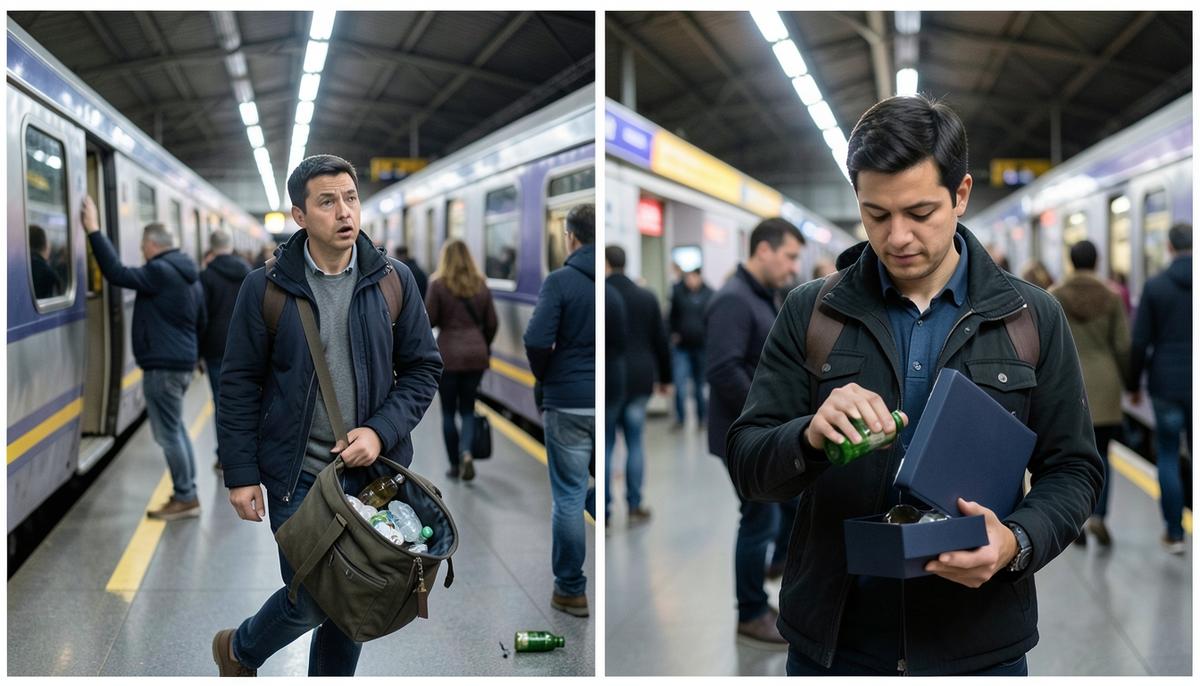
Action must also produce visible change. A character may glance toward the departing train, stop running, notice an object, reach into a bag, or relax after using the product. Small actions often create stronger motion design than large gestures because the viewer can follow them clearly. Describe the starting state, the transition, and the ending state. “The bottle changes” is too vague; “the crushed bottle rolls toward the frame edge as the commuter opens a dark blue case and lifts out a metallic green bottle” defines a readable physical event.
Visual emphasis tells the viewer where to look. Position, contrast, depth, lighting, and motion can guide attention without adding graphics. The crumpled bottle could be isolated under harsh station light while the background is softer and cooler. During the transformation, warm light could appear along the product edge, but it should reveal form rather than behave like unexplained magic. In the final frame, the bottle may remain sharp while station colors become muted, ensuring that the product owns the visual hierarchy.
Translating Still Composition into Motion
A storyboard for motion needs a clear beginning, movement direction, and end state for every shot. Pushing in suggests focus or growing importance; pulling back can reveal a broader world or create emotional distance. A lateral move may connect locations, while a stationary frame can increase tension by forcing attention toward an action inside the composition. Movement should follow the narrative rather than compete with it.
Add motion in layers. Subject movement can carry the story, such as the commuter entering or opening a case. Camera movement can guide attention, such as a slow push toward a product detail. Environmental movement can establish atmosphere, such as moving crowd shapes, a rotating departure board, or reflections sliding across glass. Use these layers selectively. If the crowd moves strongly, the camera also tracks, and the product rotates independently, the viewer may not know where to look.
The before-and-after boundary is critical. Each shot should specify what is already visible at the beginning, what changes during the shot, and what remains for the next shot. A three-second bottle rotation may work on its own, but it becomes confusing if the next shot reverses the product’s position or changes its color. Motion is clearer when the end of one shot naturally supplies the starting composition of the next.
Maintaining Continuity Across Generated Shots
Continuity includes more than character appearance. Track the bottle’s shape, color, closure, markings, position, scale, lighting direction, and relationship to the commuter. Also record where the time of day appears to be, which hand holds the product, and whether the station remains the same environment. In AI-assisted production, these details should be written as explicit constraints because a visually similar object may still change subtly between shots.
Separate continuity anchors from creative variation. The metallic green color, circular cap, and narrow white indicator can be anchors that remain identical. The background crowd, camera angle, and lighting may vary to support the narrative. This distinction helps creators preserve recognition while avoiding a sequence of nearly identical frames. If the product must move from the platform to an office and then a park, define which anchors must survive each environment change.
Transitions should be motivated by an action, shape, direction, or visual idea. The commuter’s arm moving right can lead into the next shot from right to left. A circular bottle cap can match-cut to a round clock. A transition should support comprehension, not merely decorate a cut. Avoid abrupt changes that alter identity-critical details unless disorientation is intentional and then repeated consistently.
Reviewing Storyboard Quality
Review the storyboard twice. First, view it silently and describe the story in order. If you cannot identify the problem, transformation, experience, and resolution, revise the frames or actions before improving the style. Second, view it as a visual designer and inspect hierarchy, contrast, pacing, and transitions. A beautiful frame cannot compensate for unclear storytelling.
Use measurable questions for self-assessment. Can you locate the focal subject within one second? Does every camera movement have a reason? Does each shot contain a visible state change? Does the product remain recognizable? Are the beats proportional to their narrative importance? Are repeated compositions adding new information or merely delaying the story? These questions expose problems more reliably than saying that the storyboard “needs more energy.”
Before generating final visuals, compare the rough and revised versions. The rough storyboard may use similar shots, weak spacing, and competing action. The revision should establish a stronger focal path: first the crushed bottle, then the commuter’s reaction, then the metallic green product, and finally the complete usage moment. The final standard is not maximum polish; it is immediate narrative legibility supported by deliberate visual emphasis.
Summary
A strong motion storyboard converts a brief into a chain of visible changes. Framing reveals what matters, action creates progression, camera movement guides attention, and visual emphasis controls the viewer’s reading order. Continuity anchors keep recurring subjects and objects recognizable, while purposeful transitions connect separate shots into one coherent experience.
The practical workflow is straightforward: identify the story beats, allocate screen time, define each shot’s starting and ending state, inspect the focal hierarchy, and revise until a silent viewer can follow the narrative. The storyboard becomes valuable because it exposes weak logic early, when changes are still inexpensive.
Lesson Checkpoint
Review what you learned and get feedback on your work.